Here’s how to set up and use the Auto InMail function.
Setting Up the Auto InMail Function
To use the Auto InMail function in CompLeadly, you first need to create a LinkedIn or Sales Navigator search. These searches serve as the basis for the target audiences you want to reach later on.
Here’s how: https://user.compleadly.com/en/knowledge/introduction-to-the-use-of-the-sales-navigator
After creating the search, you can save the target audience in CompLeadly. To do this, copy the link of the search and save it under "Target Audience" in CompLeadly.
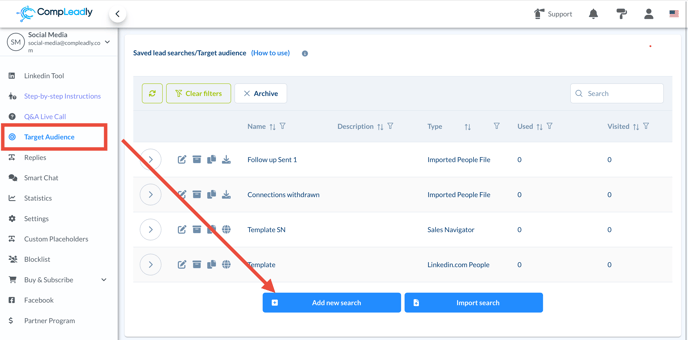
Editing the InMail Settings
To edit the InMail function, click on the pencil icon next to the corresponding feature.

Here you have various customization options:
- Add Notes: You can add notes to better organize your target audience.
- Select Target Audience Types: Choose whether it's a LinkedIn contact list or a Sales Navigator target audience.
- Set Timeframe: Specify the start and end dates during which the InMails should be sent.
- Set InMail Limits: Determine the maximum number of InMails to be sent per day.
- Subject and Message: Add the subject line and message you want to use in your InMails.
- Use Placeholders: Utilize placeholders to personalize your messages.
Distinction Between Free and Paid InMails
CompLeadly distinguishes between free InMails to "Open Profiles" and paid InMails. Open Profiles are premium members who allow receiving free InMails. If you want to use up your paid InMail credits, you can also set this in the settings.
More on this: What are Open Profiles?
Additional Options and Filters
CompLeadly offers a range of filters to further refine the target audience and exclude certain contacts: - Skip Connected Profiles: Avoid messaging contacts you are already connected with.
- Filter by Profile Picture: Skip profiles that don’t have a profile picture.
- Export Formats: Choose the export format for your contacts, e.g., Excel, CSV, or Google Sheets.
- Target Audience Segmentation: For large audiences (>2,500 results), you should split them into smaller subgroups to ensure all results are displayed.
Sending the InMails
After making all the settings, you can send the InMails either through Sales Navigator or the regular LinkedIn chat. It is recommended to use the LinkedIn chat, as messages are more likely to be seen and are permanently stored there.